
Pixel perfect: How to display images in the Go Playground
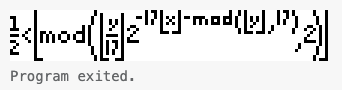
In the previous Spotlight, I shared demo code for Tupper's Formula, a formula that can generate an image of itself (and virtually anything that can be shown as a 17x106 black-and-white image). The code prints the image as Unicode blocks to stdout, because every code running in the Go Playground prints results as strings to stdout, right?
Well, not quite. The Go Playground can render images, albeit with a trick. I'll explain this with the Tupper code from the previous issue. After calculating the 17x106 bitmap matrix, the original code prints the matrix like so:
bmap := tupperMatrix(k)

for _, line := range bmap {
	for _, c := range line {
		if c {
			fmt.Print("█") // Unicode block character
		} else {
			fmt.Print(" ")
		}
	}
	fmt.Println()
}
The output doesn't look very nice, though. The “image” is distorted because the block character is much taller than it is wide, and furthermore, there is space between adjacent characters and lines.

Time to fix this! A little-known fact is that the playground can render images of type image.Image. Since the only available output is text output via fmt.Print/ln/f, the playground implements a trick: Output that begins with the string IMAGE: is interpreted as a base64-encoded .png image. So for printing out an image.Image, all we need to do is to:
- Encode the
image.Imageas a PNG using `image/png.Encode()`` - Printing a string that starts with “IMAGE:” and continues with a base64 encoding of the PNG image.
Here is a straightforward implementation:
func displayImage(m image.Image) {
	var buf bytes.Buffer
	if err := png.Encode(&buf, m); err != nil {
		panic(err)
	}
	fmt.Println("IMAGE:" + base64.StdEncoding.EncodeToString(buf.Bytes()))
}
This is a “more-high-level” version of ShowImage in package golang.org/x/tour/pic.
The next step is to turn our Tupper matrix into an image.Image. As an extra feature, let's add a scaling factor to enlarge the image because if printed 1:1, the image is really tiny!
We need to change func main() after calling tupperMatrix(). Function tupperMatrix() can remain completely unchanged, by the way.
First, create an RGBA image of the matrix’ dimensions, each dimension multiplied by the scale factor.
Then, replace the nested print loop with a nested loop that fills each pixel with the color black or white, depending on the Tupper matrix’ boolean value.
Finally, call displayImage() with the resulting image.
bmap := tupperMatrix(k)

img := image.NewRGBA(image.Rect(0, 0, 106, 17))

for y := 0; y < 17; y++ {
	for x := 0; x < 106; x++ {
				if bmap[y][x] {
					img.Set(x, y, color.Black)
				} else {
					img.Set(x, y, color.White)
				}
			}
		}
	}
}

displayImage(img)
There is just one slight drawback: The resulting image is tiny! No worries, a few more lines help inflate it to any size you like.
bmap := tupperMatrix(k)

scale := 3 // Adjust for larger/smaller output (e.g., 2 = 2x2 pixels per original pixel)
width := 106 * scale
height := 17 * scale

img := image.NewRGBA(image.Rect(0, 0, width, height))

for yOrig := 0; yOrig < 17; yOrig++ {
	for xOrig := 0; xOrig < 106; xOrig++ {
		for yScaled := 0; yScaled < scale; yScaled++ {
			for xScaled := 0; xScaled < scale; xScaled++ {
				x := xOrig*scale + xScaled
				y := yOrig*scale + yScaled
				if bmap[yOrig][xOrig] {
					img.Set(x, y, color.Black)
				} else {
					img.Set(x, y, color.White)
				}
			}
		}
	}
}

displayImage(img)
Run this code in the playground and get Tupper's rendered as a nice image:
Much better than the ASCII art graphic, isn't it?