
Controlling a Digispark board
The Digispark is perhaps as small as a microcontroller board for DIY electronics can get. This is a short writedown about my first experiences with controlling this board through Go code, using Gobot and LittleWire.
Table of contents
A tiny microcontroller board
It was after the latest Munich Gophers Meetup when a few of us went to a local bar to talk about Go, life, and hardware. Yes, hardware. From foldable USB keyboards to Raspberry Pi Zero W to some incredibly small microcontroller board called Digispark.
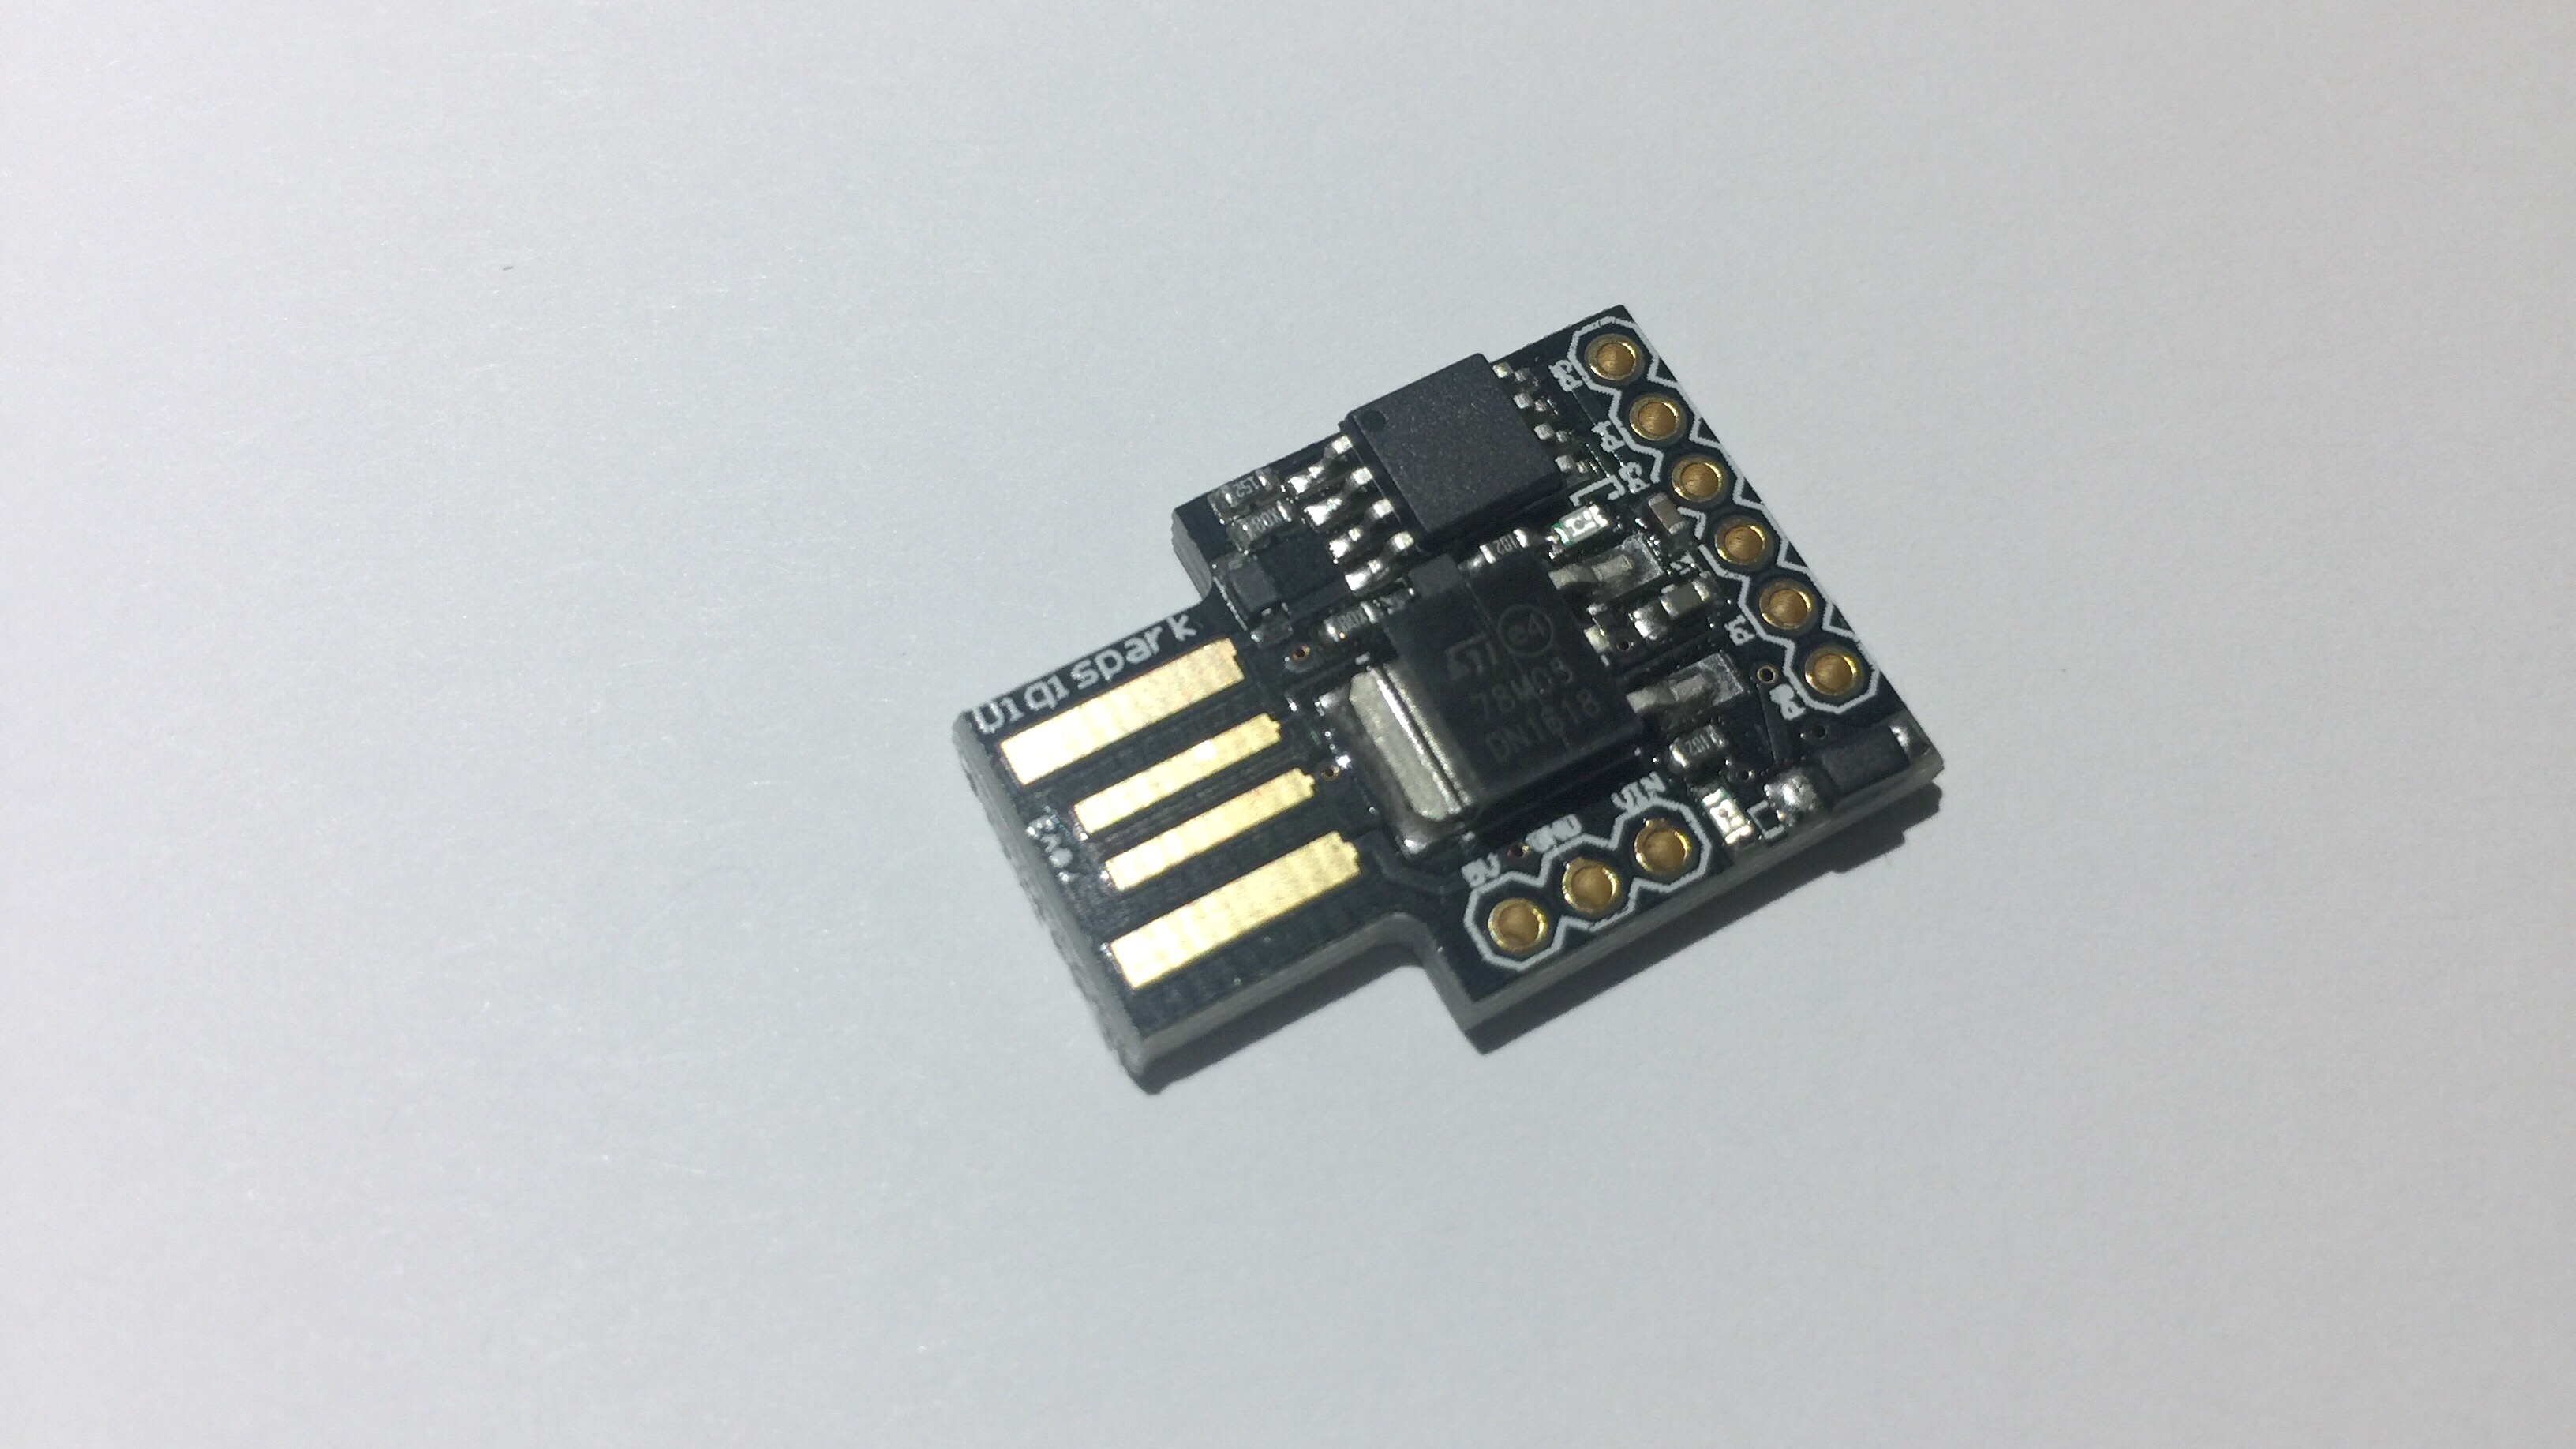
This one caught my attention. (Ok, the board is nothing new, but I did not hear of it before.) The Digispark is a board built around an ATtiny85 microcontroller chip and features -
- Incredible six (!) I/O ports
- A whopping 8 KB of flash memory (that's over eight thousand bytes, folks!)
- A blazingly fast 16.5MHz system clock
This tiny board connects directly to an USB port of a host computer and can be equipped with Arduino scripts (with restrictions of course, it is a much smaller controller than the one on the Arduino boards), but this is not an Arduino blog, so here comes the Go part.
UPDATE: Since the article was first published, the installation steps have considerably changed, and are even simpler now, thanks to the helpful comment from Ron Evans of gobot.io. Hence most of the following section has been rewritten.
Controlling a Digispark board from Go code
With a few more (software) ingredients, the I/O ports can be controlled from Go code running on a PC/Mac/LinuxBox/etc. These are:
- LittleWire
- Gobot
- Gort
LittleWire is basically a script that adds USB communication capabilities to the Digispark. With an accompanying library at the USB host's end, the board's I/O ports can be remote-controlled from an app running on the host.
Gobot is a Go robotics framework that connects Go apps to a large array of electronic devices, from the little Digispark to Arduino, Raspberry Pi, and even Quadrocopters.
Gort is a CLI tool for Gobot and other (non-Go) robotics frameworks. Here we use it for installing LittleWire on the Digispark board.
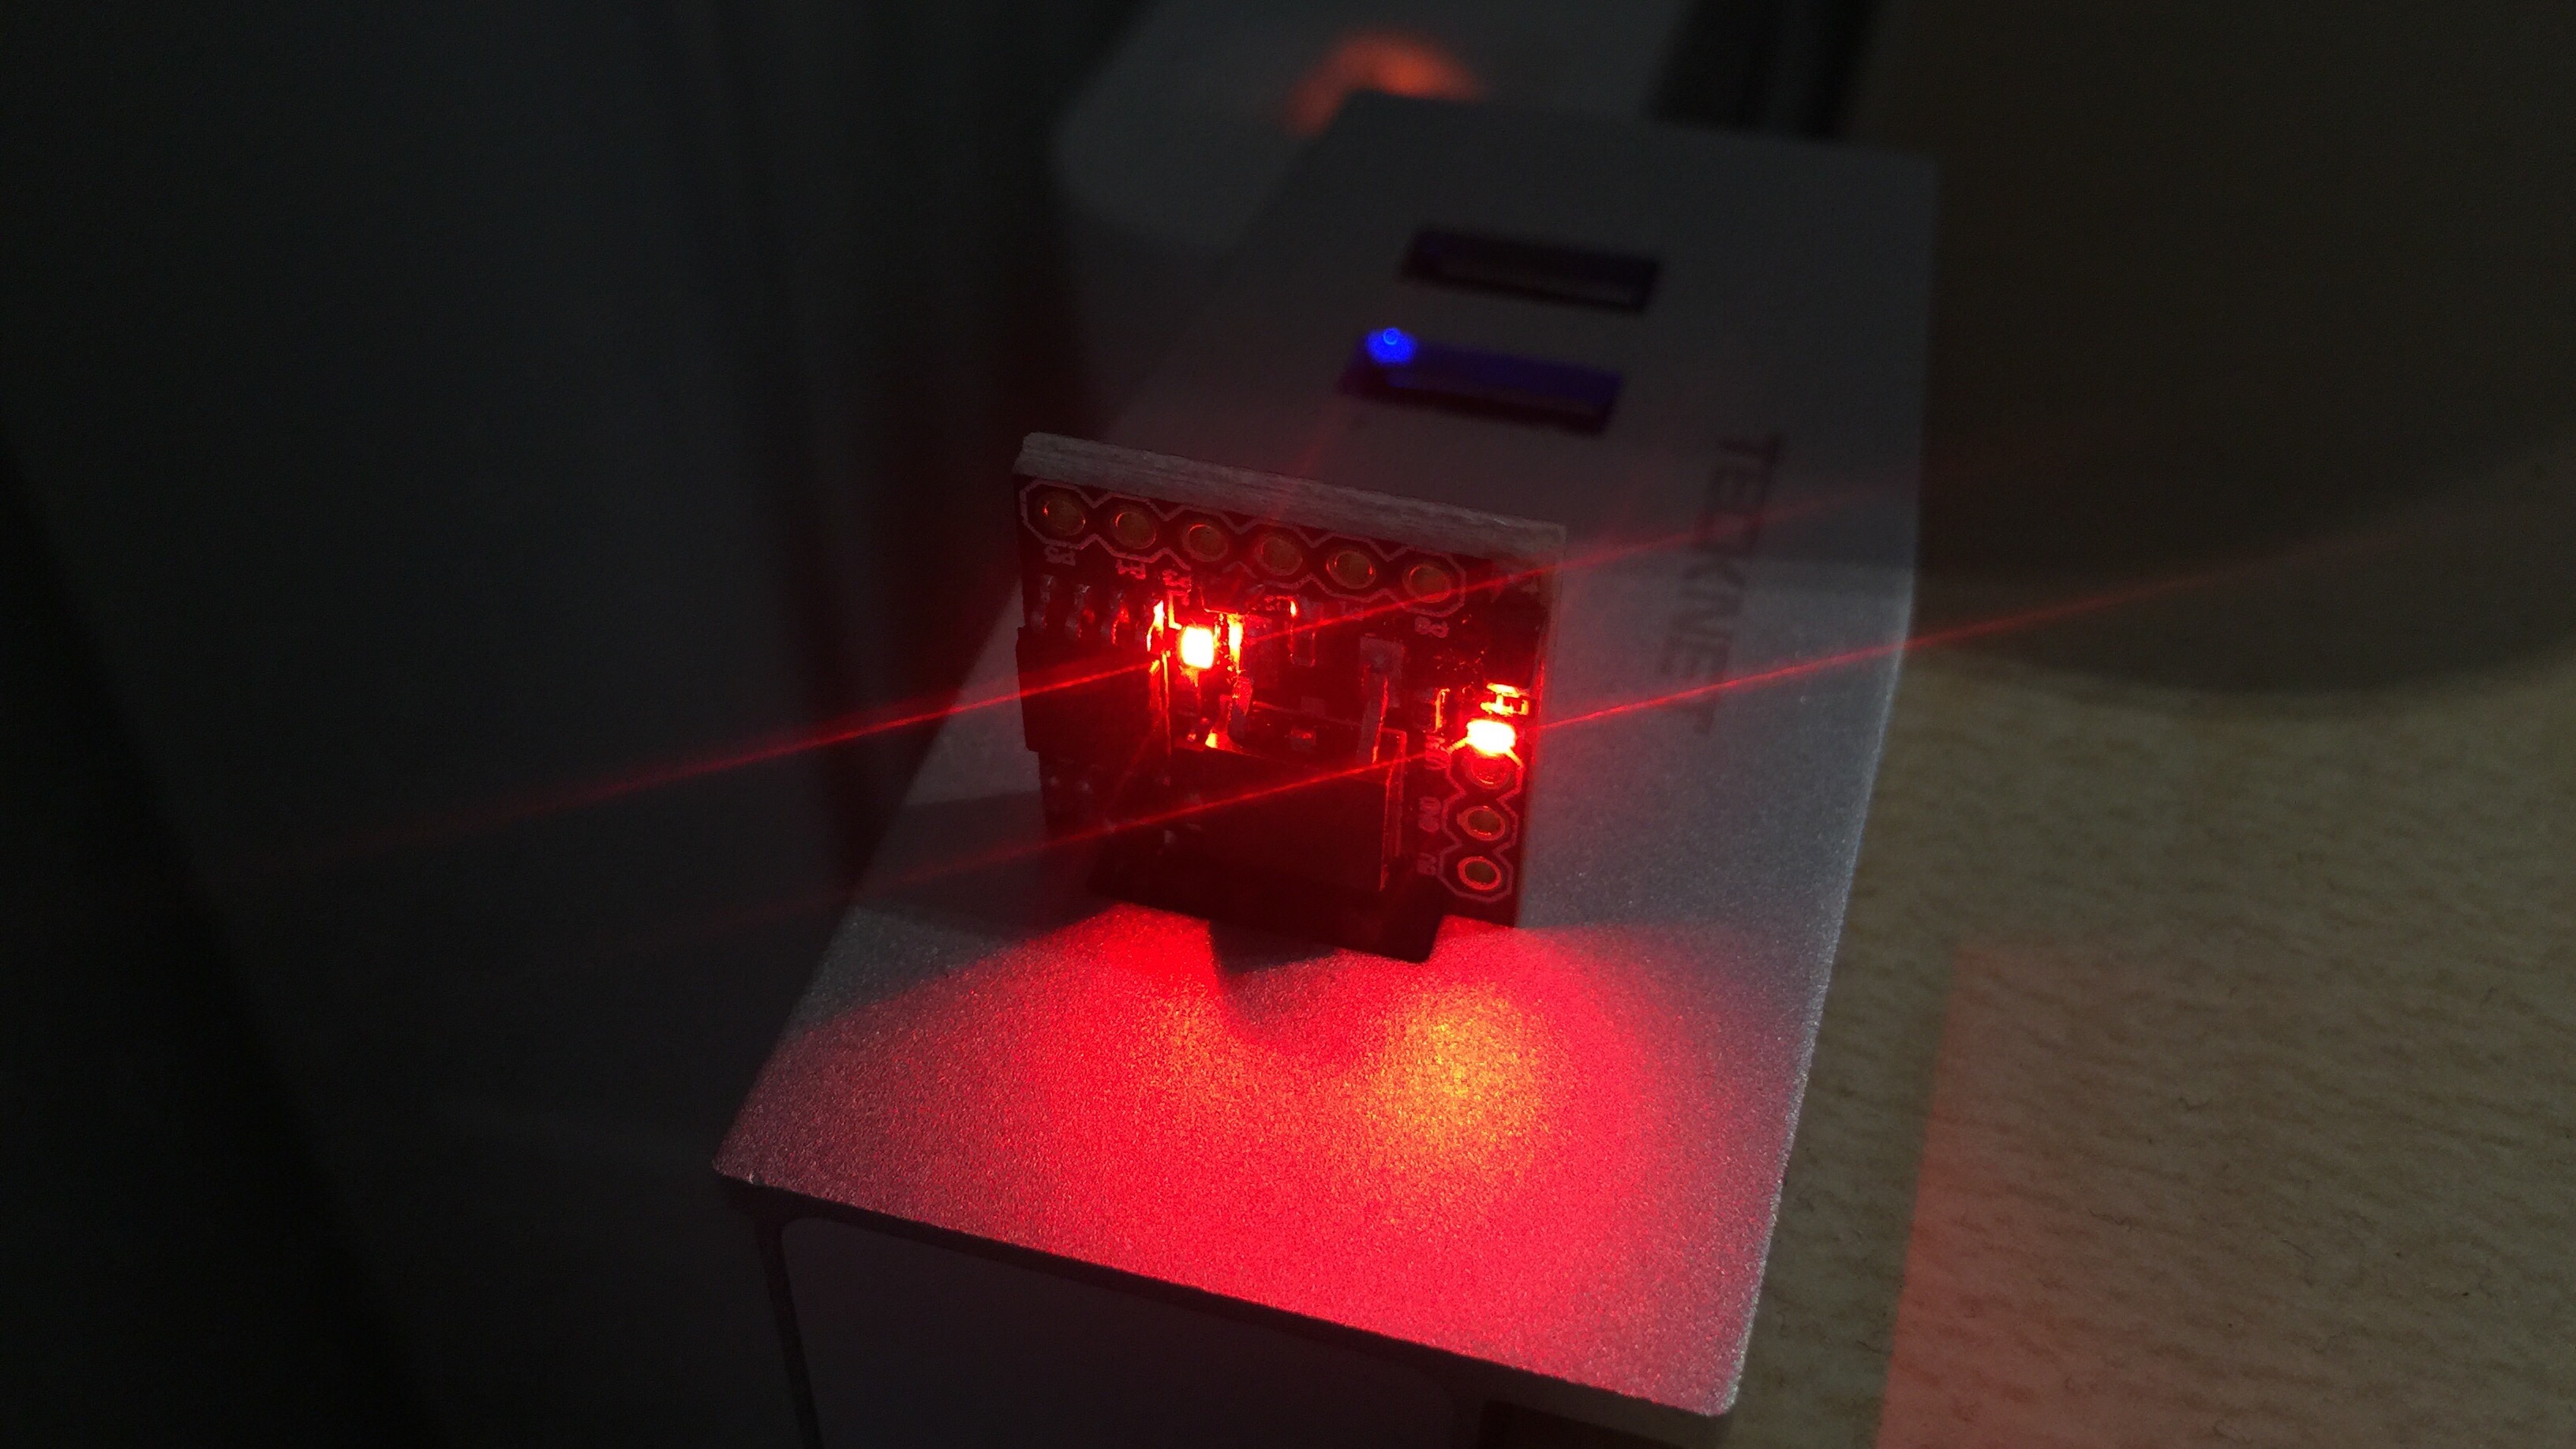
And here is how I used all this to make the onboard status LED blink, and a servo motor move.
The steps
Step 1: Install Gobot
For Mac and Linux, some USB libraries need to be installed. On the Mac, this is a one-liner if you have Homebrew installed.
brew install libusb && brew install libusb-compat
On Ubuntu (and surely also on other Debian-based distributions), a simple apt-get does the trick.
sudo apt-get install libusb-dev
Now I was ready to fetch Gobot and install the Digispark platform package. (If you are new to Go: the ellipsis at the end of the go get line advise the go get tool to also download all subprojects, even if the top project does not import them. The -d is also important as this prevents the go get tool from installing anything at this point. The only thing we want to install is the Digispark package.)
go get -d -u gobot.io/x/gobot/...
Step 2: Install Gort
Gort can be downloaded from gort.io or build from source. On a Mac you can also use Homebrew to enjoy automatic updates:
brew install hybridgroup/tools/gort
Which I did.
Step 3: Install LittleWire
Gort makes installing LittleWire a snap. One command downloads the LittleWire firmware,
gort digispark install
and a second one uploads it to the Digispark controller.
gort digispark upload littlewire
The second command waits until the controller is plugged into an USB port. This ensures that the controller listens to the host, as the micronucleus bootloader cuts the connection after a few seconds, in order to make all ports available for I/O.
On my end, the upload command failed until I switched to an old USB-2 hub. The Digispark docs on gobot.io mention an issue with USB-3 and Mac Book Pros from 2012. I have no Mac Book Pro, but my Mac Mini is also from 2012, maybe it shares the same USB controller with the MBP.
Anyway, the Digispark board is now ready to receive commands. Time to write some Gobot-fueled code.
The code
After everything was in place, I wrote the below code to make the onboard LED blink and let a servo move from 0 to 180 degrees in steps of 45 degrees. This video shows the outcome:
But now on to the code:
package main
import ( “log” “time”
	"gobot.io/x/gobot"
	"gobot.io/x/gobot/drivers/gpio"
	"gobot.io/x/gobot/platforms/digispark"
)

func main() {
digispark := digispark.NewAdaptor()
gpio package contains drivers for various sensor and actor hardware.
Here, we use the LED and servo drivers.
Each driver needs the adaptor to use and the number of the pin to control. led := gpio.NewLedDriver(digispark, "1")
servo := gpio.NewServoDriver(digispark, "5")
work is the main routine that a Gobot robot executes. We will pass this func
to NewRobot. work := func() {
Every plans actions in fixed intervals. It does not wait for previous
actions to complete before triggering the next action. ledTicker := gobot.Every(2*time.Second, func() {
for i := 0; i < 10; i++ {
After schedules an action after a specific time. It does not wait. gobot.After(time.Duration(i)*100*time.Millisecond, func() {
					led.Toggle()
				})
			}
		})
		gobot.After(6*time.Second, func() {
Every returns a *Ticker that we stop after a while. ledTicker.Stop()
})
servoTicker := gobot.Every(7*time.Second, func() {
Move moves the servo into the given position
(between 0 and 180 degrees). servo.Move(45)
gobot.After(1*time.Second, func() {
servo.Center()
})
gobot.After(2*time.Second, func() {
servo.Move(135)
})
gobot.After(3*time.Second, func() {
				servo.Move(170)
			})
			gobot.After(4*time.Second, func() {
				servo.Move(10)
			})
		})
		gobot.After(30*time.Second, func() {
			servoTicker.Stop()
		})

	}
	robot := gobot.NewRobot("AppliedGoBot",
		[]gobot.Connection{digispark},
		[]gobot.Device{led, servo},
		work,
	)
	err := robot.Start()
	if err != nil {
		log.Println(err)
	}
}
How to get and run the code
This code is only useful if you have a Digispark at hand, but in any case, here are the installation instructions.
Step 1: go get the code. Note the -d flag that prevents auto-installing
the binary into $GOPATH/bin.
go get -d github.com/appliedgo/digispark
Step 2: cd to the source code directory.
cd $GOPATH/src/github.com/appliedgo/digispark
Step 3. Run the binary.
go run digispark.go
(Stop with Ctrl-C.)
Conclusion
Controlling hardware can be quite fun! I already envision a couple of neat (and useless) things I could create:
- An analog voltage meter that shows the number of emails in my inbox
- An array of LED's for monitoring the status of remote servers
- A big, red panic button that triggers any kind of emergency action (instant server shutdown, for example)
- and more!
A big part of the fun surely is the Gobot framework. It certainly deserves a closer look! Maybe I write another post when/if I have enough time and some more hardware to test out.
Caveats
- Ultra-low-cost devices like the Digispark often have no means of electrical protection. So if you connect the wrong things to the I/O ports (or the right things in a wrong way), you might not only fry the microcontroller board but maybe also the USB chip on your computer's mainboard, and maybe even the mainboard itself. So be careful about what you are doing, and always check your wiring twice! Also, a USB hub can lower the risk of damaging your mainboard if you fry your microcontroller board.
- The Digispark is cheap, and some clones are even cheaper. (The Digispark is open hardware.) Mine is a clone, as it has a “rev3” tag although no such revision exists for the original Digispark. I got it for EUR 1,95, and at this price tag, don't expect high quality. For example, my board exposes a strange behavior when the servo is moved for the first time: The on-board LED then stops working until I unplug the device. I am not sure if other boards expose this problem as well. Maybe this particular board is a lemon but maybe the problem is in the hardware specs, or maybe the clones I have are just of low quality. (I assume the latter.)
Can it get cheaper than that?
If you want to control devices, e.g. an LC display, without any additional controller hardware, hop over to this post on Dave Cheney's blog and learn how to connect an LC display to an unused monitor port (HDMI, DVI, VGA - either of these works).
Happy coding!
gobotpackage, we also need thegpiopackage for controlling the pins, and thedigisparkpackage for talking to the Digispark board via USB.